
Have you been experiencing issues with your VPN connection in Windows 10? Are you encountering errors such as “Can’t connect to VPN” or “The remote connection was denied”? If so, don’t worry because we have a solution for you. In this article, we will guide you through the steps to resolve VPN connection issues in Windows 10.
Understanding the Problem
When configuring a VPN connection in Windows 10, you might encounter an error stating that the remote connection was denied. This can happen due to the username and password combination not being recognized or the selected authentication protocol not being permitted on the remote access server. This issue particularly arises when connecting from a Windows 10 client to a VPN server configured in Windows Server 2003.
Bạn đang xem: VPN Connection Issue in Windows 10
The Solution
After conducting thorough research, we have identified the root cause of this problem. The issue lies with the CHAP and MS-CHAP V2 protocols used in the VPN server configuration in Windows Server 2003. When creating a new VPN connection from Windows 10, it does not use the CHAP and MS-CHAP V2 protocols by default. However, you can resolve this issue by following the steps outlined below:
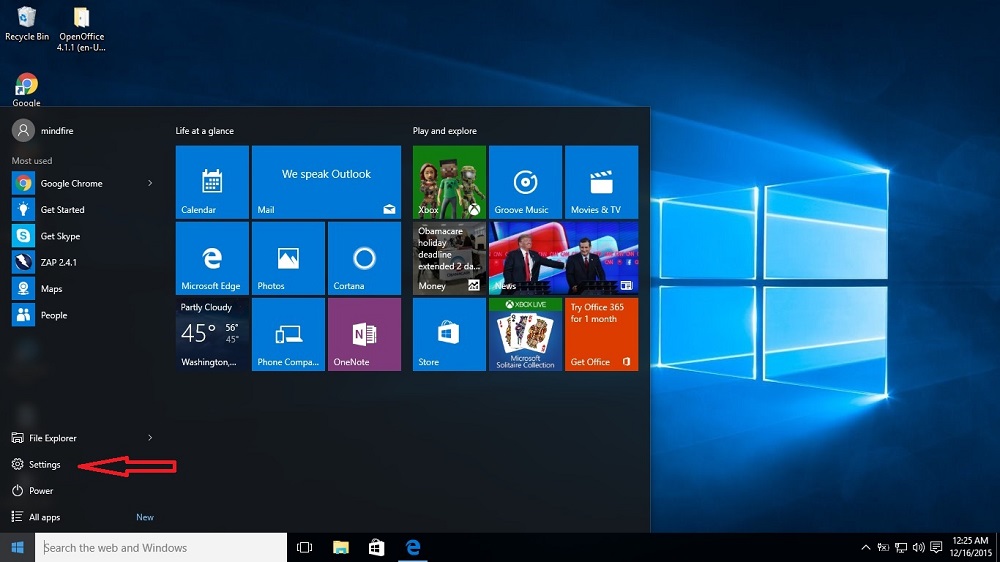
Step 1: Access the Settings
Click on the Start button and go to Settings.
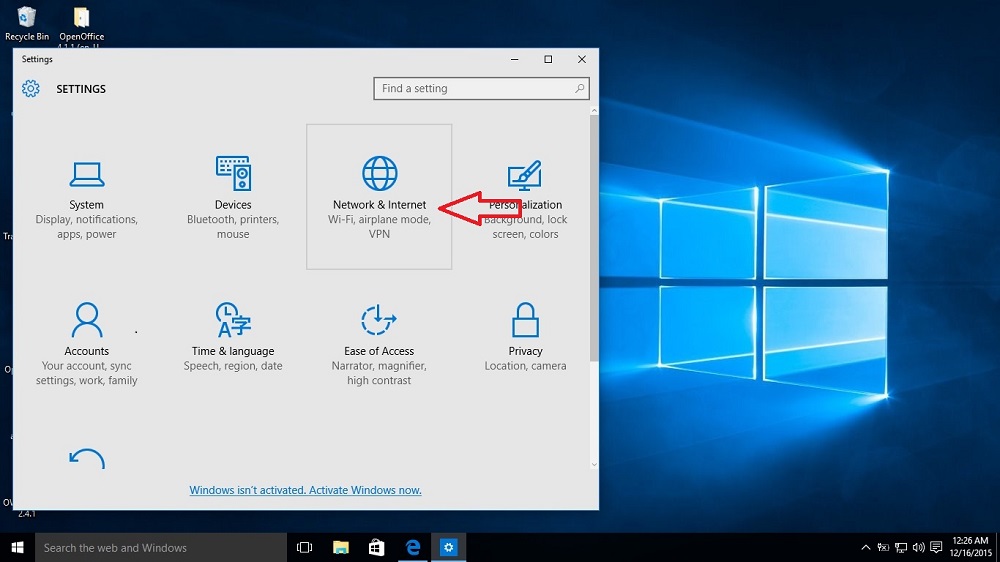
Step 2: Network and Internet
Within the Settings menu, click on Network and Internet.
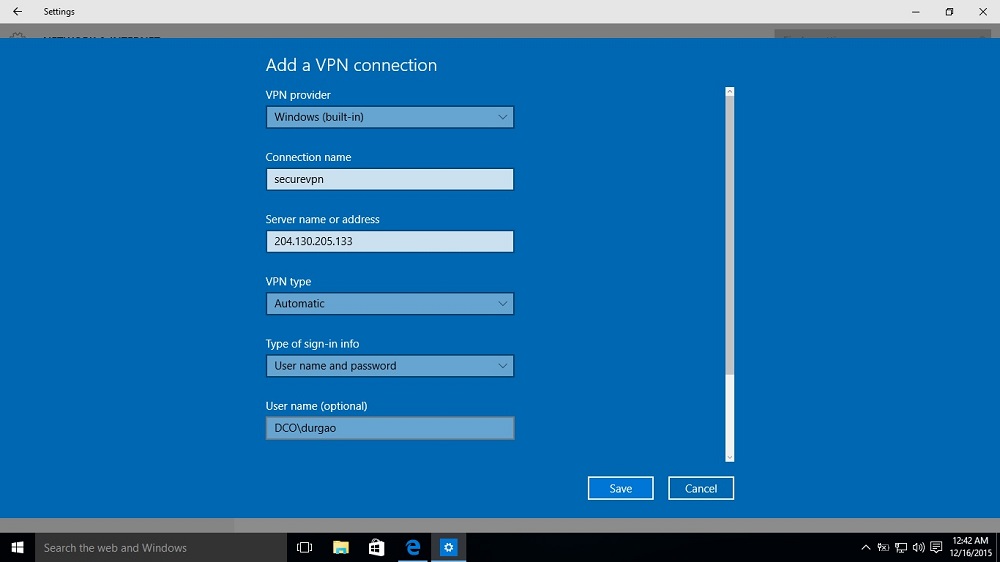
Step 3: Add a VPN Connection
Select VPN from the left menu and click on “Add a connection”. Fill out the details, such as VPN Provider (Windows built-in), your user credentials, server name and address, and keep the VPN type as Automatic.
Step 4: Internet Options
Xem thêm : Earthlink Email Guide
Once the new VPN connection is created, select it and click on “Internet Option” below the page, as shown in the image.

Step 5: Internet Properties
Go to the Internet Properties page and select the VPN connection. Click on “Settings”.

Step 6: VPN Properties
From the VPN settings, click on “Properties”.

Step 7: Protocol Selection
In the VPN Properties settings, ensure that the “Type of VPN” is set to Automatic and select “Allow these protocols: MS-CHAP V2”.

Step 8: Connect
You can now connect from your Windows 10 client to the VPN server configured in Windows Server 2003.

Windows 10 clients do not use the CHAP and MS-CHAP V2 protocol setting by default, which is why you encounter the above error when connecting to a VPN server configured in Windows Server 2003. By following the steps outlined above, you should be able to resolve this issue and establish a successful VPN connection.
Frequently Asked Questions
Q: What is the main cause of the VPN connection issue in Windows 10?
A: The VPN connection issue in Windows 10 is primarily caused by the CHAP and MS-CHAP V2 protocols not being used by default when creating a new VPN connection.
Q: How can I resolve the VPN connection issue in Windows 10?
A: To resolve the issue, you need to manually configure the VPN connection to use the CHAP and MS-CHAP V2 protocols. Follow the step-by-step guide in this article to make the necessary changes.
Q: Can I use the same solution for other versions of Windows?
A: No, this solution specifically addresses the VPN connection issue in Windows 10 when connecting to a VPN server configured in Windows Server 2003.
Conclusion
We hope that the steps outlined in this article have helped you resolve the VPN connection issue in Windows 10. By configuring your VPN connection to use the CHAP and MS-CHAP V2 protocols, you can establish a successful connection to a VPN server configured in Windows Server 2003. If you have any further questions or encounter any difficulties, feel free to reach out to us. Stay connected and enjoy a seamless VPN experience with Eireview!
You might also like: Install Linux as a guest operating system on Oracle VM Virtual Box and configure Port Forwarding.
Nguồn: https://eireview.org
Danh mục: Technology